

Concrete is a sturdy material that’s practical and affordable. In many cases, it can even be quite beautiful. Unfortunately, it’s also an extremely porous material, so using concrete sealer is an absolute must – especially if your concrete is outside.
If you’re a DIY enthusiast who is laying or sealing some concrete for the first time, here’s what you should know before you get started.
What is a Concrete Sealer?
Concrete sealer is a product that’s applied to concrete to prevent damage. It protects against everything from staining to outright corrosion. It seals the concrete against water, grime and other damaging elements that are present in everyday life.
Sealers across different brands use a number of different ingredients and formulas, though most are either water-based or petrochemical. There are some sealant bases that are more common than others. These include polyurethane, epoxy, acrylic resins and various silicas. Some sealers can also provide colour enhancement or other appealing visual effects.
Most sealers are easy to apply for a DIY user and can be applied with simple tools like a roller, sprayer or brush, depending on the product that you buy. A good rule of thumb is to apply two thin coats.
Popular concrete sealer brands in Australia include Chemforce, Environex and Stain Proof. We particularly recommend Stain Proof – they have a huge range of different sealers and have a great reputation for quality.
Why should you use it?
Concrete is very porous, so it’s particularly susceptible to damage and will stain easily. Concrete that’s unsealed will age much faster than concrete that is properly sealed and maintained. This is why it’s so important to apply a high-quality concrete sealer.
All of this is especially true if you live in an environment that regularly gets to freezing temperatures. The tiny droplets of water in the unsealed pores of your concrete will expand as they freeze. This will literally destroy your concrete, and it will do so fairly quickly.
There are two different types of concrete sealer available.
Now that you know what concrete sealer is, it’s time to figure out what kind of concrete sealer you want. Concrete sealers fall into one of two categories – Film Forming Sealers and Penetrating Sealers. Here are the differences between the two:
1. Film Forming Sealers (or Surface Coat)
A film-forming concrete sealer forms a solid protective layer, or film, over you concrete. This film will partially enter the pores of your concrete and then adhere, creating a resilient, hard-wearing coat of sealant over the surface.
Sometimes called a surface-coating sealer or a topical seal, a film-forming sealer is easy to maintain and reapply, but isn’t quite as durable. Some film-forming sealers will leave your concrete with a glossy look, but many brands will offer matte-finish additives, and most will also allow you to select your desired level of sheen, gloss and tint.
Epoxy and polyurethane film-forming sealers are the more reliable and durable choices. Thinner acrylic-based sealers are a more affordable option, but they will need to be re-applied more regularly. Film-forming sealers are approved for interior and exterior use.
2. Penetrating Sealers
As the name suggests, penetrating sealers do a much better job of getting right into the concrete. They penetrate all the way into the pores of the concrete, forming a long-lasting and durable protective layer all the way through your surface. It’s great for both interior
Penetrating sealers need to be reapplied much less frequently than a film-forming sealer and have better resistance against contaminants like grime, salt, oil and water. If you’re expecting your concrete to get very dirty or endure some heavy-duty conditions (think your garage) then you should invest in this type of sealer. It’s usually the better choice for commercial uses too.
One more thing – these penetrating sealers have a more natural-looking finish than film-forming sealers, which will be desirable for many people. However, you may not get quite as many choices when it comes to colour enhancement or tinting.
What are the safety considerations?
Sealer isn’t the most dangerous thing in the world, but it still requires a fair bit of caution. Getting it in your skin or eyes can do some real damage, so make sure to always wear gloves, eye protection, long sleeves and trousers when you’re applying this stuff.
Wear a mask while applying sealer if you can, and try to avoid breathing in any fumes at all, especially if you’re using a petrochemical-based sealer. If you’re applying it inside then take extra care to ensure there is ample ventilation, as these fumes can be toxic and may cause respiratory stress or damage.
When is the right time to apply sealer to my concrete?
You can put concrete sealer on at almost any time, but not if the concrete is fresh. You should let freshly laid concrete rest and cure for around a month before you put sealant on it.
In terms of when you need to re-seal, it depends on the severity of the conditions and the quality of the sealer. A lot of sealer companies will swear that you need to reapply every 1-3 years (no surprises there) and that’s roughly the lifespan of acrylic sealers. However, the truth is that a high-quality concrete sealer can last for roughly a decade.
You can tell that it’s time for a re-seal when stains, grime and scratches are visible on your sealant layer. When water appears to soak into the concrete instead of forming droplets on the surface, that’s another sign that your sealant is losing it’s waterproof qualities.
Finally, if you’re doing up some existing concrete, be sure to wash it first. The last thing you want is to trap pollutants and moisture beneath your layer of fresh new sealant.
Thanks for reading our guide to concrete sealers. If you’re a DIY user who is looking to seal some concrete, this information should give you a much better understanding of what you’re doing, and what kind of sealant you should use for the job.
Multifors is an online hardware store that’s focused on convenience and quality. We stock a curated range of high-quality sealers, from trusted brands like Stain Proof, Environex, Chemforce and Envirosheild. Shop our range today with next-day delivery across Metro Melbourne for only $19.95.
Screws are everywhere. They hold much of our world together, and even the most inexperienced DIYer has definitely used a screw or two before.
Simple, right? Well, not quite. There are plenty of different types of screws out there, and you really shouldn’t be using just any old screw for your project. Chances are there’s actually a specific screw out there for the job that you’re doing.
There’s not even a solid agreement on exactly how many types of screws there are. A quick Google search will return everything from 9 to 12 to 36 – but we reckon there are roughly 10 you should know about. Here they are:
1. Wood Screws
Used for drilling into wood, this is your standard screw. It’s commonly made of bronze, brass or steel and comes in lots of different sizes. There’s not a lot to be said about this one – you know it, you love it. But it’s a good time to get familiar with the different parts of a screw.
Wood screws have threading most of the way up the shank, and the threading gets coarser towards the sharp tip of the screw. The threading stops just before the head, which can be flat, round or oval and is commonly tapered into the shank. You should pre-drill a hole for these screws.
2. Chipboard Screws
Chipboard screws are similar to your standard wood screw, but they have skinnier shanks and a coarser thread. This thread is usually asymmetrical, a feature that distinguishes it from a standard wood screw and gives it extra holding power in the chipboard
Another difference is that these threads run all the way from the tip to the head of the screw, whilst standard screws have some unthreaded shank at each end. Combined with the other features, this is a screw that’s been specifically designed to grip well in a soft, composite material like chipboard
Overall, these aren’t exactly heavy-duty screws. But that’s perfect for chipboard, which can be easily damaged by other, larger screws.
3. Plasterboard/Drywall Screws
As the name suggests, these screws are perfect for fastening things to drywall and plasterboard. They have deeper threads than a regular screw, which helps them stay firmly lodged in the plasterboard. Their tips are also sharper to reduce tearing.
These screws are generally black, as they’re often coated in a protective layer like carbon or zinc to prevent corrosion over time. All of this makes them a great choice for fastening things to your plaster walls, like installing brackets or hanging a painting.
One last thing – you’ll find these screws in two types. W-type drywall screws are for fastening drywall to timber. They’re longer, thinner and have a coarser thread. S-type screws are designed for attaching metal. S-types have a sharper tip and a finer thread. They are usually self-drilling (which means you won’t need to pre-drill a hole).
4. Metal Fixing Screws (Sheet Metal Screws)
These are a type of ‘self-tapping’ screw (more on this later) that are designed for fastening metal to metal or metal to timber. You’ll commonly see these with hex heads, although as with most of the screws on this list, there are all kinds of heads available including Phillips and flatheads.
These screws have threads all the way up the shank, and these threads are much sharper than your average screw. The tip is extra-sharp too, as these screws need to cut through solid metal and hold firmly. You might use these to attach sheet metal to a frame or to build metal furniture.
You can generally drill these screws straight into softer materials, but you’ll need to drill a smaller pilot hole first in tougher metals like steel. That’s because these are ‘self-tapping’ screws – which is a bit different from a self-drilling screw. In fact, let’s get into the differences between these two now.
5. Self Tapping Screws
This is a broad category of screws that other more specific screws – like the sheet metal screws above – may fall into. A self-tapping screw has threading that is designed to tap itself into the material it’s being screwed into.
Usually made out of hardened steel or other solid materials, the thread on this screw is sharp and goes all the way down to the tip. This helps the screw cut into the material and thread (or ‘tap’) itself into the material as it goes in. This gives you a quick, easy screw-in and an extra-strong bond.
On softer materials, a self-tapping screw can be drilled right in. However, you’ll still need to drill a pilot hole first for tough materials, because the tip won’t be sharp enough to get through. This hole should be slightly smaller in diameter than the screw so that the threading on the shank can still ‘tap’ in.
The terms self-tapping screw and self-drilling screw are often used interchangeably, but there are some differences between the two. I’ll explain what they are below.
6. Self-Drilling Screws or ‘Tek’ Screws
A self-drilling screw is similar to a tapping screw but it has a tip that resembles a drill bit, so it drills its own hole as it goes in. Behind this is a thread that, like in a self-tapping screw, is designed to ‘tap’ itself into the surface for a stronger bond.
So what makes this different from a self-tapping screw? The crucial difference is the drill-bit shaped tip; a self-drilling screw is drilling itself a hole before the rest of the screw goes in. A self-tapping screw is only threading itself in, or ‘tapping’, and it will generally require you to drill a pilot hole first. The self-drilling screw eliminates this extra step.
Self-drilling screws are often called ‘Tek’ screws after a popular brand of screws that have become synonymous with this design. Some people consider these the most convenient screws to use, and it’s true that they can save you a lot of time when applied to the right project.
7. Masonry & Concrete Screws
As the name suggests, these are heavy-duty screws that are good for fastening timber, metal and plastic to concrete and masonry. They’re often made out of carbon or other tough, corrosion-resistant materials.
They have hardened, notched threads that alternate between high and low. This helps cut into the hard concrete and adds grip, but more importantly, this clever design also removes concrete shavings effectively and helps to stop deformation in the concrete.
The tips of these screws are sharp, but not so sharp that you won’t need a pilot hole first. Like with self-tapping screws, this pilot hole should be smaller in diameter than the screw to allow the thread to tap in.
If you try to punch one of these into concrete or masonwork without a pilot hole, you probably won’t get far. Our pro-tip? Use an impact driver for this screw instead of a regular drill – here’s why.
8. Roofing Screws
Roofing screws are heavy-duty screws that are built to last, and they’re perfect for – you guessed it – attaching roofing. There are a lot of different roofing options out there, so you’ll find a wide variety of roofing screws designed for different materials, from metal to timber to colorbond.
However, there are generally a few uniting features that make all of these screws a roofing screw. For one, a roofing screw has much better washers than other screws, usually made of neoprene rubber that’s designed to make a watertight seal. After all, the last thing you want is a leaky roof!
For this reason, many roofing screws are also self-drilling, to minimise the chance of creating a less-than-watertight hole in your roof. And because roofing screws are exposed to the elements, they’re generally made of very sturdy materials. It’s also common that they’re galvanised or zinc-plated to further prevent the risk of corrosion.
9. Treated Timber Screws
Treated pine and other pressure-treated timbers are a highly popular material for DIY-ers, especially when you’re building furniture or installing decking. But it’s important to always use treated timber screws when you’re working with this material.
This is because the chemicals used to preserve or ‘treat’ this wood oxidises with zinc, and this will quickly corrode and destroy most standard materials. To resist this chemical reaction, treated timber screws need to be made of stainless steel, hot-dipped galvanised steel, or feature a ceramic coating.
If it’s not made, there’s a good chance that the copper and other chemicals in treated pine will eat it away. Don’t cheap out and use standard screws with treated pine or other pressure-treated timber – you’ll pay the price!
10. Batten Screws
Batten screws are heavy-duty screws, and they’re great for securing heavy timber. They’re great for securing hardwood to a sub-floor, or for other heavy-load construction tasks.
The defining feature of a batten screw is the shape of the head, which is called a ‘bugle’ head. These bugle heads feature a less severe angle, allowing the screw to countersink neatly into the hard timber without splitting the wood. The tip of the screw is extra-long and specially fluted to catch any wood chips.
These screws also feature a very thick shank – usually around 7mm – and come in a range of lengths, although you can expect them to be fairly long. Self-tapping threads or self-drilling tips are common amongst batten screws as well, though not always present.
Finally, these screws generally have hex-bit heads – don’t ask us why. However, you can sometimes find them with flat-head or Phillips-head grooves instead.
So there you have it. Understanding these 10 popular types of screws will make it much easier to select the right screw for your next DIY project or professional job. There’s still plenty to talk about when it comes to the humble screw, so we’ll be posting more blogs about it in the near future.
Multifors is an online hardware store that’s focused on quality and convenience. Check out our huge range of screws, power tools and accessories here. Next-day delivery across Metro Melbourne from $19.95.
Sanders are one of the most helpful power tools out there. There are plenty of jobs where sanding by hand just isn’t a viable option – it’s too tiring and too difficult to apply evenly. That’s why an electric sander is such a good investment, even for a casual DIYer.
But there are a few different types of sanders out there, and each has its own pros and cons. Below, we’ll talk about the 5 most popular types of sanders to help you decide which one is the right choice for your next project or power tool purchase
1. Random Orbital Sanders
Random Orbital Sanders are the most popular sander on the market today, and for good reason. These sanders are versatile and easy to use – it’s actually quite hard to leave a scratch with a random orbital sander! However, they still pack a decent enough amount of power.
These sanders work by spinning off-centre and vibrating as they orbit, creating a random motion. This random motion results in a smoother, more even finish as there’s no repetitive pattern hitting the grain again and again. Random orbital sanders typically use a specialised 5” or 6” pad that has to be replaced after a while.
You’re simply more likely to get a scratch-free finish with a random orbital sander. This is compared to a regular orbital sander, where the repetitive, uniform orbiting motion commonly leaves grooves or scratches if you’re not careful or you go against the grain.
Truthfully, you can use a random orbital sander effectively on most jobs. It’s a good in-between for those medium-sized areas when a small finishing sander won’t cut it but a belt sander would be too intense. While they’re great at smoothing wood out, they’re not the best for ripping away huge amounts of wood quickly
2. Belt Sander
A belt sander is the workhorse of electric sanders. This should be your go-to sander on big surface-area jobs, or jobs where you need to take off a lot of timber. However, belt sanders are very powerful and it’s easy to damage your wood if you’re not used to handling them
Essentially, a belt sander has a motor that powers two drums. These drums spin and turn a sandpaper belt at high velocity, sanding the timber in a single linear direction. These are big, two-handed power tools that exert a lot of power, so you’ll need to be careful as you handle them.
A belt sander will save you a lot of time when it comes to removing wood and levelling rough surfaces. But it’s also the quickest way to damage your project if you slip up. Always try to work slowly and steadily with a belt sander, aim to go with the grain and never push down too hard on your timber.
Finally, you should always use a clamp on smaller objects so that the belt sander doesn’t send them flying across the room. Finely detailed sanding jobs are not really suited to this tool, but heavy ones definitely are. If you treat this powerful tool with respect, you’ll get a lot out of it.
3. Orbital Finishing Sander
These are the predecessors to the Random Orbital Sander, and while they’re not as versatile as their random cousins, they’re still a useful sander in their own right.
Sometimes called a ‘finishing sander’, these are great for prepping for paint, knocking off a thin layer or if you only need to do some light sanding. They’re also much cheaper than random orbital sanders, at roughly half the price.
Orbital sanders are often small (think the palm of your hand) and easy to manoeuvre, making them great for smaller jobs. They have a standardised rectangular sanding pad that’s awesome for getting right into corners.
There’s minimal cross-grain scuffing compared to a belt sander, although you can definitely still leave obvious scratches if you’re not careful or you go right against the grain. The other downside is that these just aren’t really powerful enough for huge surfaces or heavy sanding.
On the upside, it’s a bit cheaper to restock sandpaper than if you were using a random orbital sander, as you can simply cut regular sandpaper to fit and clamp it in, instead of having to buy a replacement random orbital sanding pad.
4. Disk Sander
A disk sander is a more specialised woodworking tool that’s perfect for sanding fine, tricky details and curved edges. It’s a table-mounted power tool, which means that you can use both your hands to manoeuvre and shape the wood with ease.
Essentially, the disk sander is what it sounds like – a spinning disk of sandpaper that’s mounted vertically on a tabletop. They’re generally pretty large. This mounted set-up is ideal for small projects that require precision shaping – like curves – or even if you want to remove a lot of wood very quickly by pressing your wood hard against the spinning disk
The obvious downside is that the tabletop design is fairly impractical for large sanding projects, and downright impossible for heavy objects or things like floors. Certain DIYers or woodworkers will get a lot of value and precision out of this unique tool, but a general user may find the design pretty limiting.
5. Multi Sander
It’s in the name, multi sanders are sanders that combine multiple sanding functions into one tool. Because they’re designed with convenience in mind, these sanders are often small enough to fit into the palm of your hand.
A multi sander can have as many as 5 or 6 different sanding options, though there’s no fixed amount between different brands and models. At the very least, a multi sander will have a minimum of 2 modes – even if that’s just switching between orbital sanding and random orbital sanding.
The one thing to keep in mind with these is that it’s a bit of a ‘jack of all trades, master of none’ situation. For instance, a multi-sander may have a belt sander setting, but it won’t be as good as a real belt sander. This usually goes for most settings – but that’s not to say they’re bad. Some of the higher quality multi-sanders out there offer incredible value
Overall, any kind of multi-sander is an excellent choice if you only sand occasionally and you’re not sure what kind of projects you have coming up in the future.
These are the five main types of sanders available. Having an understanding of these 5 sanders will help you make the right choice when you’re choosing a sander for your next DIY job.
Explore our curated range of high-quality sanders at Multifors. We’re an online hardware marketplace with a huge range of power tools and power tool accessories. Fast delivery across Metro Melbourne from $19.95.
There are few power tools more versatile than the humble soldering iron. A soldering iron is a compact type of welding tool that uses high temperatures to melt solder and join two pieces of metal together in a permanent and airtight way.
These nifty little tools can come in all shapes and sizes, depending on what you’re using them for. And they really do have a lot of uses!
But first – how do soldering irons work?
Soldering irons can run on gas or butane, but most derive their heat from simple electricity. Simply lay a thin wire or foil sheet of solder along the metal components you would like to join, then melt it with the tip of your soldering iron to fuse the metal together. Solder is a tin-alloy that may also contain materials like copper, lead or oxide-removing flux.
Here’s are 5 DIY projects that you can do with a soldering iron:
1. Working on circuit boards and electrical wiring.
Soldering irons are best known as an electrician’s tool, because their compact size and precision makes them an excellent choice for splicing wires together or attaching them to terminals. Solder is a great conductor, so it’s a natural choice for fastening electrical circuits.
Any regular, run-of-the-mill soldering iron will do a great job of soldering the wiring in your home. If you’re into technology, you can also try experimenting with circuit boards. You’d be surprised at how sophisticated you can get with these projects!
Soldering works wonders for attaching these tiny wires, and it will adhere well to both the plastic boards and their galvanised metal components. For these jobs, it’s best to invest in a smaller soldering iron pencil with accurate temperature control, as precision is very important when working on these small circuits.
Don’t stop reading if wiring isn’t your thing. There are plenty of other reasons why a soldering iron is still a super useful tool to have around the house.
2. Fixing up your home – especially for roofs, plumbing and damaged gutters
One of the best reasons to keep a soldering iron handy is for home repairs. There are plenty of metal joints and components in a home, and many of them will need to be regularly repaired and maintained over their lifetime.
That’s where your soldering iron comes in. You can use it to patch holes, strengthen joints or even replace certain metal fixtures. It’s particularly useful for joining and repairing roofing sheets or gutters that have degraded over time. The watertight and airtight seal created by a soldering iron is perfect for the demands of a roof.
Roofing is one of the only areas where a 50/50 tin and lead solder is still commonly used. This is because the lead alloy is more durable, more flexible and can better withstand the high sun and temperatures of a sheet-metal roof. But lead solder is quite toxic – so you shouldn’t use it in most settings, and use caution when you do use it.
You can also use your soldering iron to repair your plumbing and fix leaky pipes – although you should obviously never use a lead-based solder when you’re working on your water pipes. We shouldn’t have to tell you why!
3. Completing small repairs on your car
It’s not just your home that your soldering iron will be able to repair. It’s also an incredibly useful thing to have on hand for minor automotive repairs.
Your car is made almost entirely of metal, and that metal is exposed to the elements regularly. The joints and metal components in your car can degrade over time, and your soldering iron is a useful tool for fixing some of these.
Obviously, solder isn’t going to be strong enough for any engine repairs or serious fixes. But just like with your home repairs, your soldering iron will do a great job when it comes to tightening joints, filling in cavities & holes or smoothing out corroded areas.
If you’re comfortable with wiring and you know what you’re doing, a soldering iron will also allow you to repair auto-electrical issues or make modifications to your lights, radio, electric locking systems and more.
4. Creating Mosaics
It’s not all about hard labour – soldering irons have some creative uses as well. It may surprise you to hear that you can actually use a soldering iron to make your very own mosaics and stained glass windows.
This was traditionally done with lead solder, but today we use less toxic alternatives. Solder won’t stick to glass, but wrap some copper foil around the edges of the glass that you’d like to stick together and you’ll be good to go with your soldering iron. Be sure to add a coat of liquid flux as well, or choose a solder that already contains this. It will help strengthen the bond.
Creating your own stained glass window or a mosaic is an exciting project that will leave you feeling very accomplished. Depending on your design, you may also need some other power tools to safely cut the glass into your desired shapes, and a roller to apply the liquid flux.
5. Designing or fixing your own jewellery
Another popular use for soldering irons is making jewellery. Jewellers rely on soldering irons for repairing and crafting jewellery, and it’s a great DIY craft project for you to try with your own soldering iron.
Whether you’re repairing a beloved pair of earrings, creating a fused chain for a necklace or repurposing some recycled goods into a funky bracelet, the possibilities of what you can create with a soldering iron are limited only by your imagination.
Depending on the material your jewellery is made out of, you may need to purchase some specialty solder first. Silver, bronze and gold solders are commonly used for jewellery soldering and are widely available.
The soldering iron is a versatile little tool that can get a lot done. These are 5 of the most popular uses for a soldering iron, but there are many more. You never know just when your soldering iron will come in handy.
Shop our curated range of high-quality soldering irons at Multifors. We’re an online hardware marketplace with a huge range of power tools and power tool accessories. Fast delivery across Metro Melbourne from $19.95.
There’s more to choosing the right tiles than just liking a colour and shape. Whether you’re gearing up for some DIY tiling, or you’re choosing a style for a professional to install, there are some important things you need to consider first.
Here are the 5 most important things you need to be thinking about when you’re choosing your tiles:
1. Is it actually waterproof?
Not every tile is a good match for a wet area like a bathroom, despite how good it might look. People choose tiles because they’re much more waterproof than timber or carpet, but many popular tile materials – like marble – actually do a terrible job of handling moisture over time.
When you’re choosing a tile material, be sure to do your research on how waterproof it really is. Make sure you keep waterproofing in mind when choosing a grout as well. You don’t want to have to spend a fortune retiling only a few years later.
2. How slippery is the surface?
This is another thing that might not be at the front of your mind, but it’s an important factor to consider. Tiles with a polished look can be extra-slippery, and popular materials like ceramic and porcelain can be notorious for this – especially if they also have a waterproof glaze on them.
If you’re older and prone to falls, or you have young kids, this should be a serious concern. Stone tiles – like granite or limestone – can be a better choice. If you’re on a bit of a budget, try vinyl tiles. Vinyl comes in a wide range of styles and has great non-slip qualities.
3. Don’t use easily stained materials in the kitchen.
Some tiles have great waterproof and non-slip qualities, but stain super easily. Porous materials – like limestone, concrete, and quarry tiles – are probably the biggest offenders for this.
We recommend never using these tile materials for kitchen floors or splashbacks. You don’t want to be worrying about permanently staining your tile when you’re cooking that bright orange curry or red-wine pasta sauce.
It’s better just to choose a tile that’s easy to clean, like porcelain or ceramic. There are some great stone-look tiles out there that are made out of these simpler, more affordable materials.
Glass tiles are a great choice for splashbacks as they clean extremely easily. Though obviously, they are too fragile to make for a good floor tile. This brings us to the next consideration, and perhaps the most important – durability.
4. Prioritise durability for high-traffic areas.
When you’re choosing tiles for an area that gets a lot of foot traffic – like a hallway or anywhere where shoes will be worn – then the strength of your tile should be a primary concern. Some thinner tiles are better suited to walls and won’t do well as a floor tile.
Consider thickness, hardness, and the type of glaze when you’re tiling a high-traffic area. A cheaper tile might seem like a bargain initially, but you’ll end up spending more on maintenance over time.
Tiles that have been fired at high temperatures – like porcelain tiles or quarry tiles – are great affordable workhorse tiles that can take a beating without chipping or cracking.
5. Don’t go crazy with colours, patterns and tile sizes.
Now that we’ve gotten all the sensible stuff out the way, you can start to have fun thinking about the visual style of your tiles. Yet although choosing a tile style for your home can be exciting, you should try and exercise a little bit of restraint in your selection.
Stick to 2 or 3 colours and sizes throughout the home – it will likely look a bit of a mess if you don’t. Another thing you should consider is room size: A smaller room will always look better with smaller and lighter-coloured tiles, whereas a spacious room will look even bigger with dark flooring and large tiles.
Busy patterns like terrazzo tiles or mosaics can look amazing but are better kept to feature walls or small areas. Tiling a whole room with them will generally be too visually noisy. Otherwise, though, you should feel free to follow your own tastes and take a few risks. It’s the best part of DIYing your own home!
These are 5 of the most important things to consider when you’re choosing tiles for your wall or floor. Having this knowledge handy is especially important if you’re DIY-ing, as you won’t have an expert around to call out any potential mistakes.
Looking for a bit of inspiration for your tiling project? Why not check out the wide range of porcelain tiles and ceramic tiles at Multifors. We can deliver your tiles and your tools right to your door, with fast delivery across Metro Melbourne from $19.95
When it comes to choosing tiles for your home, you’re pretty much spoiled for choice. Whether you’re looking for wall tiles or floor tiles, there are a staggering amount of options out there for you to choose from.
To make it a little easier for you, we’ve rounded up 10 of the most popular options out there. We’ll talk a little bit about how these tiles are made, what their strengths and weaknesses are, and when you should use them.
This certainly isn’t an exhaustive list, but it should help you get a better understanding of the most popular tile materials available on the market today.
1. Ceramic Tiles
Along with porcelain, ceramic is easily one of the most popular choices out there. These tiles are clay-based and fired in a kiln. These tiles are relatively soft and have a great feel underfoot. This softness also makes ceramic a great choice for DIY, as they’re super easy to cut and lay.
However, this softness also means they’re not particularly durable and may chip easily. They also won’t stand up well to water without a waterproof glaze added. Generally, this is a pretty versatile tile but we wouldn’t necessarily recommend it for showers or high-traffic flooring.
These days, most people go for Ceramic’s harder cousin, Porcelain, as it’s more durable for a similar price. But one thing that Ceramic has going for it is the wide range of colours. There are so many bright and colourful options to choose from that just aren’t available in Porcelain
2. Porcelain Tiles
Arguably the most popular tile on this list, ceramic is a great all-rounder. porcelain tiles are actually a sub-type of ceramic tile, but they’re generally the better choice. Porcelain has been fired in the kiln for longer than regular ceramic and at much higher temperatures.
This makes for a stronger and more waterproof tile that will do great anywhere in your home, especially in a bathroom. Porcelain has a reputation for being a bit harder to DIY than ceramic, but we think the difference is negligible. Check out our breakdown of Porcelain vs Ceramic Tiles to figure out which one you should use.
Because porcelain is so sturdy and affordable, it’s a great substitute for many of the more temperamental natural materials on this list. Stone-look porcelain tiles are a great solution when natural stone just isn’t a practical choice.
3. Cement Tiles
Cement tiles are pretty trendy at the moment, and it’s easy to see why. They’re a visually appealing tile that’s easy to customise. There are some really cool patterns and colours out there to choose from, and the naturally porous nature of concrete adds great natural texture.
One of the biggest draws of a cement tile is that it can be sanded and resealed like a wooden floor. The downside is that laying cement tiles is a serious task, even for an experienced DIYer. They also need consistent upkeep over time, so we’d recommend this for a small, visually exciting feature area and not anywhere with super high traffic.
4. Glass Tiles
Glass tiles are beautiful but fragile, as you might expect. They’re also very popular as a relatively affordable option. These glass tiles may chip easily, but they’re unbelievably easy to clean and care for. Most things will wipe right off and they don’t really stain.
These will best suit a minimalist aesthetic or a wall mosaic, and we don’t recommend using glass for floor tiles at all. However, because they’re so easy to clean, glass is one of the best options out there for kitchen splashbacks, feature walls or benchtops.
5. Granite Tiles
There are a lot of different stone tiles out there, but granite is probably the most popular. A hard and dense stone, granite is incredibly durable, which makes it a great choice for high-traffic areas. We recommend granite pretty much anywhere as a floor tile, as it’s going to last a long time. However, it may be too heavy to make for a practical wall tile.
Granite offers a hint of luxury without breaking the bank like Marble or Onyx might. As a natural material, the naturally occurring patterns in granite mean that no two tiles ever look exactly the same. One downside of granite is that it’s naturally hard and cold, which can feel a bit bracing underfoot, especially on a chilly winter morning.
6. Marble Tiles
One of the most iconic tiles out there, marble tiles are synonymous with luxury and refined beauty. The downside, obviously, is that marble is bloody expensive.
It’s also surprisingly hard to clean and it scratches and stains easily, meaning it’s not a good option for high traffic areas. We recommend using marble sparingly for effect if you don’t want your upkeep budget to give you a headache.
If you’re looking for a slightly cheaper alternative to marble, try quartzite or onyx tiles. These two stones are visually similar to marble, widely available, and perform in roughly the same way.
7. Limestone or Travertine Tiles
Limestone is another highly popular stone tile that has a great classic look. It’s naturally abundant in Australia, which makes it a relatively affordable option compared to other stone tiles. It’s also low maintenance – really, this tile has a lot going for it. It can be a pain to clean though, because it’s naturally very porous and stains easily.
Limestone naturally forms near underground water and so handles wet environments extremely well when properly sealed. It’s also highly slip-resistant, making it a great choice for bathrooms or outdoor pool areas. Overall, its soft and porous nature makes it easy to DIY, but this also means it can degrade quickly if it’s not sealed properly.
One of the most popular forms of Limestone for tiling is Travertine. This particular type of limestone material was extremely popular in Ancient Rome, and many travertine-tiled buildings are still there, so you know it’s going last a very, very long time! Travertine is the go-to material if you want an ‘antique’ look.
8. Quarry Tiles
Quarry tiles are also a very popular choice. These tiles are made from ground-up minerals like clay and shale and fired at extremely high temperatures. They’re actually pretty similar to bricks – both in their visual look and in the way they’re made – but they’re much more solid and durable.
These tiles are naturally slip-resistant and are a great choice for any high traffic area. Visually, they often look great as an outside tile as they’ll match a brick home. One place we wouldn’t recommend using these tiles is the kitchen, as they stain quite easily and the stains are hard to get out.
9. Mosaic Tiles
You’re probably familiar with mosaic tiles. They’ve been popular for thousands of years, and they’re still pretty trendy today. There are countless styles, colours and patterns to choose from, and mosaic tiles are great for visually exciting feature areas, splashbacks or even small bathrooms.
However, using too many of these tiny tiles will be a headache to install and likely a headache to look at, too. We love mosaic as much as the next bloke, but we recommend taking it easy with this one.
10. Terrazzo Tiles
These colourful tiles have been around since the 16th century, and they’re still pretty trendy these days. Terrazzo tiles take tiny chips of stone like marble, granite or quartz and set them inside a binding material, usually concrete.
These are hard, durable tiles and they’re visually very appealing, especially in sunlight. They’re inexpensive to make, so they’re a surprisingly affordable option. They’re also easy to care for. However, they’re not easy to install, and we wouldn’t try DIY-ing this one.
The downside of Terrazzo is that it’s got a reputation for being very slippery when wet. For this reason, we don’t recommend it for bathroom or kitchen floors. However, it’s still a great option for a visually-striking bathroom feature wall.
Hopefully, this guide has expanded your understanding of tiles a little bit. These 10 tile materials are probably the most popular tiles out there today, so knowing about them will help make choosing the right tile a lot easier.
At Multifors, we’ve focused on stocking a huge range of porcelain tiles and ceramic tiles. We think they’re an amazing substitute for many of these trickier natural materials, and we’ve got lots of looks in trendy styles like marble, terrazzo, cement and more.
Just like anything else, the world of DIY tiling is all about the latest trends. As a hardware store, we definitely notice this in the types of projects our customers will tell us about. At any given time, there are always a few things that everyone is suddenly keen to try.
Between the projects we hear about from customers, the things we read in industry magazines, and the endless DIY hive-mind that is Pinterest and Instagram, we like to think we’ve got our ear to the ground when it comes to current tile trends.
If you’re looking for a little design inspo, here are our 5 tiling trends for 2022:
1. Earthy, natural colours and textures are having a moment.
Open up any tiling or interior design magazine in 2022, and you’re going to hear about earthy tones. These are everywhere at the moment, and it’s not hard to imagine why. After a couple of years spent largely inside, it’s no surprise that people are seeking some soothing natural tones in their life.
There are a few ways that this trend is playing out. A big one is timber-look tiles, which add a natural look without the high-maintenance of real timber. Terrazzo tiles have also ridden this wave and made a huge comeback in popularity.
Another natural material that’s everywhere right now is Limestone and Travertine. These stones have an antique look because the Romans used them for their baths, and they can conjure up a relaxing, earthy tone in your bathroom. If you can’t afford these stones, or you can’t be bothered looking after them, try affordable limestone-look porcelain tiles instead.
Even brightly coloured tiles can’t escape this natural-leaning trend – blue and green tiles are surging out ahead of other warmer colours when it comes to popularity. The vibe we’re getting is that people just really want to feel like they’re outside, even when they’re inside!
2. A trend that’s not going away: Large stone or stone-look tiles in grey & matte tones.
This is something we’re seeing more and more of these days, and we think it looks great. Large tiles in darker, matte colours look classy and add an extra feeling of space to a larger room. In particular, this trend tends to lean towards greyer stones like slate, granite, and marble.
While this look is all about darker neutral tones, the shiny specks of granite or the swirls of marble can add a great subtle touch as well. If all this sounds a bit daunting when it comes to your budget or DIY skill level, then consider getting a stone look in a different format.
There are plenty of good-quality stone-look tiles available in porcelain – like these beautiful large-format tiles from Verona Porcelain. Stone-look porcelain options are much more affordable and have the benefit easier to install yourself.
The two key places we’re seeing this trend occur are dark floors in open-plan rooms (which look spacious and hide dirt well) and feature walls in bathrooms. This ties into another trend that’s absolutely everywhere at the moment – matching these two spaces together.
3. Large-format tiles that wrap from feature wall to floor
This is another trend that’s becoming pretty common, and we like that it’s a bit cheeky. It flies in the face of conventional tiling wisdom, but you have to admit that it looks great doing it. We’re talking about using the same style of tiles for your feature wall and your floor.
The strongest example of this, in our opinion, is when it’s combined with the previous trend of large format grey or matte-coloured tiles. We’ve been seeing more and more bathrooms that have one dark grey feature wall that matches the large floor tiles, with contrasting white tiles on the other walls for effect.
This packs an extra punch when it’s combined with a frameless walk-in shower against the feature wall. Take a scroll through Pinterest – or any recently built apartment listing – and you’ll likely see what we mean. Given how effectively it gives your bathroom those luxury hotel vibes, it’s no surprise that it’s cropping up everywhere
The other place we’re seeing corner-wrapped tiles look great is on kitchen splashbacks and benches, particularly with geometric pattern tiles and subway tiles. Wrap-around tiles in these spaces can give your kitchen the feel of a trendy New York diner.
4. Hexagons and other geometric shapes are still popular.
Speaking of small geometric shapes, this is another tiling trend that’s been going strong over the last couple of years – particularly with hexagon tiles. This trend certainly doesn’t show any signs of slowing down throughout 2022.
Hexagons and geometric tiles do a good job of striking the balance between a clean modern look and vintage mosaic vibes. In particular, these tiles look great as kitchen splashbacks Trust me, those repeating patterns are supremely satisfying to look at while you’re preparing your food. Check out these gorgeous marble-style hexagons from Fossola, for example.
The other place we’re seeing these tiles consistently look awesome is the floor tiling in small bathrooms. White hexagonal or geometric tiles will do an excellent job of making a smaller bathroom look bigger, brighter, and more visually exciting.
One small tip we’d offer to anyone considering hexagon tiles is that it takes a bit of lateral thinking to DIY these. There are more sides to consider than a square tile, so give yourself a little bit of extra time to get it done right.
We definitely recommend giving these a shot though – check out some of the geometric or hexagon tiles available in the Multifors Store for some inspiration
5. Contrasting Grout, particularly in Subway Tiles and Mosaics
As epoxy grout technology gets better and better, grout is enjoying more time in the spotlight when it comes to tiling and interior design.
The wealth of colours and finishes now available means that there are lots of visually striking ways to incorporate grout into your design. Contrasting grouts (i.e. a dark grout against a white tile, or vice versa) are all the rage right now.
This looks particularly striking when used to create subway tiles, a style of small rectangular tiles that stands out with contrasted grouting, reminiscent of 20th-century subway stations. These are getting a lot of attention right now, especially as kitchen splashbacks
Contrasting grout can also be incorporated into a mosaic feature for a bit of extra punch. You can even try using a contrasting grout with the geometric tiles or hexagonal tiles we talked about above! It really does add ‘oomph’ to any repeating pattern.
These are our picks for the 5 biggest tiling trends of 2022. As you can tell, there’s a fair bit of overlap going on between these trends, which just goes to show just how much these 5 different ideas are driving what’s happening in interior design right now.
Hopefully, these trends have given you a little bit of inspiration for your next DIY project. At Multifors, we try to always stock the latest trends to make it easy to get started. Check out our huge range of large-format stone-look porcelain tiles, ceramic subway tiles and more.
Most handy people develop a pretty big collection of power tools over time.
Whether you’re a passionate DIY-er expanding your skills, a new apprentice getting your first tool allowance, or just someone fixing up your home; you’ll often find yourself needing to buy a power tool or two. And then another power tool. And then another, and another. And so on.
Yet there’s definitely a right and a wrong way to build a power tool collection. By being smart about the way you buy power tools, you can save yourself a lot of time, money and effort in the long run. Here are our best tips for building your power tool collection the smart way.
Choose a brand and stick to it.
Choosing a preferred brand of tools and sticking to it is one of the simplest, best things you can do for yourself in the long run – especially with cordless tools.
For one, it makes accessory shopping and maintenance quite a bit easier. But arguably the biggest benefit is that batteries are generally interchangeable between tools of the same brand.
Some brands do a better job of battery sharing than others. Makita and Ozito both have batteries that are well designed for sharing, but the best performer on this front is probably Bosch. Their 18V ‘Power For All’ battery powers around 40 different Bosch products, and is backwards compatible with any tools made from 2007 onwards.
Battery sharing makes keeping all of your power tools charged and ready-to-go significantly quicker and easier, especially if you buy your tools in a combo pack or purchase a multi-battery charger. Batteries themselves can get pricey too, so being able to reuse your existing batteries for new tools will save you a lot of money as your power tool collection grows.
Don’t forget to consider the battery voltage as well.
You will also have to pay attention to the battery voltages. Obviously, an 18v battery should not go in a 24v power tool, even if they’re the same brand. In many cases, it may actually turn on and work, but it will always affect performance significantly and likely damage your tool’s lifespan over time.
Some jobs might occasionally require you to invest in a tool that’s more powerful and thus has a higher voltage. Generally, though, it’s best to try and stick to one voltage across your tool collection, making battery sharing even easier.
If you still want to try out different brands but you love the convenience of battery sharing, you can use corded tool purchases as an excuse to branch out. This brings us to our next big tip: don’t assume cordless is always the best way to go.
Corded vs. Cordless tools – there’s more to it than you think.
Cordless tools are everywhere these days, and it’s easy to see why.
It’s convenient to not have to worry about the closest power outlet. The hazard of tripping on a wire is eliminated. In many cases they’re smaller, which allows you to reach tighter areas. This makes cordless a perfect fit for essential, everyday DIY tools like the drill.
Yet wired tools have plenty of benefits too. In most cases, wired tools will deliver more torque, which means more power. They can run all day long without going flat, and you’re often getting a better-quality tool compared to the more compact wireless version.
There are a handful of heavy-duty tools where you’re almost always better off getting the higher-powered corded version. Reciprocated saws, table saws, hammer drills and grinders are all power-hungry tools that need a lot of torque. The cordless versions of these tools may not perform as well, and the batteries will die fast.
Generally, the best way to choose between corded or cordless tools is to be realistic about what you need them for. If you’re a DIY-er who only uses your tools occasionally, the convenience of cordless will probably suit you better.
You need to be honest with yourself about your power tool needs.
Honestly, this is something you should be repeating to yourself over and over when you’re browsing all the shiny, expensive toys at the hardware store: Do I need this? Do I need this?
It might be tempting to always fork out for the upmarket model with all the bells and whistles, but do you really need that for the job you’re doing? The fact is, a professional-level power tool with too much power and too many extras can just get in the way if you’re only doing general DIY work on the weekends.
Be realistic. If you just need to saw some thin plywood, don’t buy a huge, heavy-duty table saw. For replacing the hinges on the screen door, just buy that cordless drill. We’re definitely not saying you should choose cheap and nasty tools, but you will be fine with a standard model for most household jobs. In fact, you’ll probably have an easier time.
Tradies buy the serious stuff because they use it everyday, from morning to night, on a wide range of jobs. As a DIYer, you only really need to invest in top-shelf power tools if you notice that you’re actually using your tools all the time. It’s also worth investing more in power tools if you’re setting out on a big & ambitious project, like building your own house.
Never buy generic-brand accessories or consumables.
This is another really common mistake people make with their power tools. DIY-ers are generally practically-minded, so they’ll often baulk at paying a higher price for a brand-name accessory. After all, doesn’t the cheaper generic version just do the same thing, for less?
Most of the time, this turns out to be a bad decision. Branded accessories and disposables have been specially made and tested for the tools, so they’ll perform well and fit the tool. This is not true of generic tool accessories, which are of varying quality and have a good chance of damaging your tool over time if they don’t fit properly.
This may seem too simple a tip, but trust us. Generic brand accessories and disposables aren’t as good for your tools, and you’ll likely spend more money in the long run fixing or replacing your damaged power tools! The cheaper upfront cost of generics is not worth it.
Talk to people, read reviews, and watch what professionals buy.
There’s so much choice in the world today that deciding on a trusted brand can be a bit overwhelming. Doing a bit of general research and getting recommendations from your friends will make deciding much less daunting.
Online reviews are good for quickly learning what experience others had with the tool, but always pay attention to who is leaving the review. That power tool might have earnt one star for being useless and frustrating to an old pro on a construction site, but it might still suit your needs perfectly as a beginner.
Still, reading reviews can be a lifesaver when it comes to avoiding nasty, low-quality power tools, especially at the budget price level. If the price seems too good to be true, it usually is! We always recommend talking to your friends and colleagues about what they buy as well. You’ll usually get some solid info that’s less confusing than a jumble of short, conflicting reviews.
Finally, if you’re looking to invest in a quality power tool, pay attention to what the tradies are using. Their needs are the heaviest, and if you’re seeing the same power tool brand on construction site after construction site then it’s likely something you can trust to get the job done.
Building a collection of power tools as a DIY-er doesn’t have to be a daunting experience. Following these 6 tips will help you do a much better job of it. By making smart decisions from the beginning, you can save a lot of time, effort and money overall.
Not keen on braving the hardware store crowds? Browse our curated online range of power tools and power tool accessories at Multifors. We offer delivery across Metro Melbourne for only $19.95, so that you can get started on the job right away with no extra effort.
Laminate flooring is one of the most popular timber flooring options available today. If you’re currently installing or updating your floors, you should definitely consider laminate if you haven’t already.
There are plenty of great reasons to choose laminate for your home. Below, we’ll break down the reasons why laminate floors are one of our favourite timber flooring choices.
1. It’s durable and easy to clean.
Laminate floors are a multi-layer synthetic flooring product. It starts off with a base that’s generally made from several thin pieces of pressed, processed timber. This gives it a solid, hardwood-like feel underfoot. Then, a photographic layer is laid on top that resembles timber, tiles, or the style of your choice.
Finally, a thick, protective melamine resin ‘wearing layer’ is then applied over the top of the print. This ‘wearing layer’ is incredibly durable. It will hold up much better than traditional timber when it comes to dealing with scratches, scuffs and moisture. This makes laminate floors a great choice for high-traffic areas like hallways or even kitchens.
One thing though – as a timber product, laminate is still not completely waterproof. This makes it unsuitable for laundries and bathrooms, where the risk of a serious water spill is much higher. For these areas, consider Hybrid Flooring, a timber-free product similar to laminate that visually looks like timber but is 100% waterproof.
Laminate is also great for people with pets and young kids, or for those who are nervous about renting out their investment properties. Compared to traditional timber, you won’t really have to worry about your heavy furniture, or making sure everyone always takes off their shoes.
2. Laminate floors are very affordable
Laminate floors are a synthetic product. That means they use a small amount of natural timber, and it’s already been highly processed. This makes laminate floors much more affordable than hardwood or even timber veneer floors.
Over the years, this accessible price range has given laminate a bit of a reputation as a purely low-quality ‘budget’ flooring material. However, this couldn’t be further from the truth. Laminate technology has come a long way, and these days there are plenty of high-quality laminate flooring options available in every price range.
If you’re building or renovating on a tight budget, laminate is a great way to get a realistic-looking timber style floor without copping the outrageous costs of hardwood.
3. It’s easy to install over any type of subfloor or floor.
This is one of the biggest benefits of laminate flooring. It’s very versatile and can be quickly installed on almost any kind of subfloor, including concrete. Many houses have subfloors that are unsuitable for timber floors, so timber-style laminate floors can be a great solution.
You can even lay laminate flooring over pre-existing vinyl floors using a ‘floating’ technique. Floating a floor is a method of interlocking the floor sections so that they hold each other in place. Floating your laminate floors means you won’t need nails, staples or even glue!
This makes laminate a great choice for DIY renovators. It’s so easy to install that most people could confidently do it themselves.
4. It comes in a wide variety of styles.
Finally, laminate gives you an unmatched level of choice when it comes to choosing a style. Because laminate flooring uses a photographic print to give the impression of timber, there’s no limit to the different styles and patterns you can print.
Higher-end laminate floors – like the ones we stock here at Multifors – are almost visually indistinguishable from real timber, with realistic patterns that don’t repeat too frequently.
Laminate gives you the freedom to choose whatever style you’d like, without having to worry about the quirks and differing price points that come with choosing different hardwoods.
Overall, laminate flooring is a great choice. It’s durable, easy to clean, and provides the look and feel of traditional timber flooring for a fraction of the cost. Best of all, there’s an endless variety of styles out there to choose from.
At Multifors, we stock a select range of high-quality laminate floors that have been designed to look convincingly like real timber. If you’d like to learn more about laminate flooring or ask a question about our products, get in touch with us today.
If you’ve got timber floors, then you know just how much extra personality they bring to your home. Timber veneer floors are one of the most popular timber flooring options out there these days, combining an affordable composite base with 100% natural timber laid over the top.
Keeping these natural materials looking their best can be a challenge, however, especially if you’re new to timber and you don’t know what you’re doing. We’ve compiled our favourite tips for caring for your timber veneer floors, to help them stay looking beautiful for years to come.
Use cleaning products that won’t harm the coating.
These days, most timber veneer floors come coated in solvent or water-based polyurethane. Some people may decide to use alternative coats, like oil or wax, but this is much less common in timber veneer than in traditional hardwood floors.
Cleaning your floors regularly is a big part of keeping your timber in great shape. However, you should check that the cleaning products you’re using are actually compatible with the coating on your timber floor. pH-neutral cleaners are generally recommended, whereas harsh acidic cleaners like bleach or vinegar can dull or damage your timber.
Just moved into a new home and not sure what kind of coating your floor has? Do a bit of research, ask around with the real estate agent or previous owner if you can, and always spot-clean an inconspicuous area first to check the results.
Mop with care! Don’t go overboard with the water.
Regular sweeping and dusting will do a lot for your floor. After all, one of the biggest advantages of wooden floors is that they’re very resistant to dirt.
However, there are times when you will need to mop your floor. Although timber veneer floorboards are significantly more moisture-resistant than traditional hardwood floors, you should still use caution when mopping. And don’t ever use a steam mop.
Excess water can damage your timber veneer over time. Instead, make sure to wring out your mop as much as possible beforehand and always do a relatively dry mop. Cool or lukewarm water is preferable as temperature fluctuations are also not good for timber.
In the event that you’ve chosen a timber veneer with a wax finish instead of polyurethane, you should never ever mop a wax finish!
Be conscious with your furniture – and with your feet!
The biggest threat to your timber veneer floor looking amazing is visible scratches and scuffs. Of course, wear and tear is an unavoidable fact of life, but there are some steps you can take to avoid the worst of it.
Always lift heavy furniture carefully when you move it around, and never drag or push it along the floor. Extra-heavy furniture may also need to be moved from time to time, to avoid forming permanent dents underneath.
The other big offender is your feet – in particular, your shoes. Shoes regularly track grit and small rocks through the house that scratch up the floor. Implementing a no-shoes policy might be the single most-effective step you can take towards maintaining a scratch-free floor.
If you have pets or small kids, then try placing rugs or runners in high traffic areas, and be sure to have mats at every outside door. These little fixes will go a long way!
Consider refinishing if your veneer is thick enough.
You may not have realised that some timber veneer floors can be refinished. While the timber coating on many veneer floors is too thin for refinishing, thicker timber veneers can generally be refinished 1-3 times over their lifespan.
This is something to consider if your floor has picked up a lot of scratches or the colour has faded over time. Refinishing involves sanding back the surface of the veneer and applying a new stain, colour or coating over the top. It looks as good as new and is great for a change.
As mentioned, timber veneer floors can’t be refinished endlessly the way that traditional hardwood can. You’ll only get a few goes (or just one!) before you can’t sand away any more veneer, so pick your battles wisely.
Timber veneer is incredibly durable, so you shouldn’t find yourself needing to refinish very often anyway. If you do decide to refinish, it’s a great way to extend the lifespan of your floor for years and years to come.
Timber Veneer’s multilayered construction makes it a fantastic flooring option. It’s more durable, less fickle and considerably more affordable than traditional hardwood flooring.
Natural flooring materials like timber look great in any home, but they do take a little bit of care and understanding. By keeping these 4 tips in mind, you should have an easy time keeping your timber veneer floors in excellent shape for years to come.
Timber is an iconic flooring choice that looks stylish and feels great. It can provide your home with a real sense of warmth and personality. Yet when it comes to deciding on your timber floor, there’s often a dizzying amount of choice involved.
Before you even get to questions about colour, board width or grading, there’s one big question you have to ask yourself first: What type of timber floor are you looking for?
Below, we’ll break down the 5 main types of timber flooring available today and talk about some of their standout features.
1. Solid Hardwood Flooring
Hardwood flooring (or ‘solid flooring’) is made of solid hardwood planks that are traditionally cut from one piece of timber, sealed against moisture & water, then laid directly over joists or subflooring.
Hardwood floors are sturdy and long-lasting, with an authentic look and feel that’s hard to match. Because it’s a natural material, it’s easy to resand or restain the timber when you feel like a change.
The unfortunate downside is that hardwood flooring is an increasingly expensive choice. Installation is also extremely time-consuming compared to other timber floors, as your hardwood planks will need to sit on-site for 2-3 weeks to properly acclimatise to moisture conditions and prevent rapid warping.
Even then, your hardwood timber will still warp gradually over time, and your floor will require ongoing maintenance every 3-4 years to keep it in great condition. An old-school hardwood floor is beautiful – but it’s a big & expensive commitment.
2. Engineered or Timber Veneer Flooring
Engineered & timber veneer floors are an extremely popular choice nowadays. These floors are multi-layered, with a thin layer of hardwood timber (called a ‘veneer’) placed above a base formed by multiple layers of plywood. They come ready to install and can be laid over any flat surface, including foam or concrete subfloors.
These are commonly installed as floating floors, meaning that their interlocking construction holds them in place without any glue. All of this makes them a great choice for those who want the look of solid hardwood but can’t quite justify the price or the extra installation time.
Because they use significantly less hardwood timber, they’re generally a much more affordable option. Thanks to the plywood underlay, engineered floors are also more stable (meaning you can use wider planks) and they’re far less subject to moisture damage. Yet thanks to the veneer, they still have that great firm hardwood feel underfoot.
Any downsides to this one? Not really. The only thing might be that because of their complex construction, engineered floors can be slightly more expensive to fix if they’re damaged. Overall, though, this is an excellent choice of flooring that’s easy and low-cost.
3. Laminate
Laminate flooring is another multilayered floor. The laminate base layer is made from multiple strands of thin, pressed wood. A photorealistic image of timber is placed on top and coated in clear, durable melamine plastic. It also commonly makes use of floating floor techniques, though the underlay is often foam rather than plywood.
If you’re looking for that timber-floor feel in your home, laminate flooring is a super easy and very affordable option. It’s also much harder to scratch or tear than hardwood or a timber veneer, making it a durable choice for those with pets or young kids.
Because the thick laminate base uses thin pressed timber, laminate flooring will give you that firm feel when you walk on it and has great insulation properties. For a product that’s so much more affordable than hardwood, it’s amazing how much laminate gets right.
We do recommend choosing higher-quality timber laminate products, however, as cheaper options can often repeat patterns too often and fail to look convincingly like real timber.
4. Hybrid Flooring
Hybrid floors are constructed in a similar way to laminate floors – the difference is that they don’t use any timber at all! Instead, it uses a material similar to vinyl floors.
So why are hybrid floors on this list? It’s because it’s an extremely popular option for those who want a timber-style floor but don’t have the budget or don’t want to deal with the upkeep.
Hybrid floors can look almost as convincing as a laminate or even a veneer, but they’re much more affordable. Best of all, hybrid floors don’t have the temperamental qualities of natural timber. Instead, they’re waterproof and highly resistant to temperature changes.
All of this makes hybrid flooring a great, affordable option. The only real downsides are that it feels less solid underfoot than laminate or veneer, and it’s temperature insulation qualities are a bit reduced compared to the other flooring options.
Overall though, you definitely shouldn’t overlook Hybrid Flooring. It’s a great choice, especially for wetter rooms like bathrooms or laundries where real timber just won’t work.
5. Parquetry Floors
Parquet flooring is made up of small pieces of timber flooring, laid out in distinctive repeating patterns. It’s attached to a subfloor, and generally comes either prefinished or finished on site.
Traditionally, these floors were painstakingly installed a single piece at a time. These days, most modern parquet flooring comes in tile form, where the timber has been bonded to a backing material. Patterns that use larger planks may still go in piece-by-piece.
Often made of hardwood, these floors generally behave the same way as solid timber planks. However, there are some areas where they perform slightly differently. The smaller parquet slats are less prone to moisture & warping, but more prone to cross-grain scratching when refinishing.
Parquet floors are the most decorative form of wooden flooring, and they can be used to incredible effect. We’d suggest choosing parquet flooring for larger, well-lit areas. For smaller or crowded rooms with dim light, adding patterned floors can sometimes feel a little too busy.
Now that you’ve got a better understanding of the different types of timber flooring, you should have an easier time deciding which choice is right for your home.
If you’re looking for some inspiration, check out the huge range of timber flooring at Multifors. We’ve got an exciting selection of laminate, hybrid and timber veneer floor products to choose from, delivered Melbourne-wide for only $19.95!
Nails are everywhere. Whether you’re a DIY-er or a full-on tradie, there’s a pretty good chance your next project is going to use some sort of nails.
Yet as a hardware store, we notice when we speak to our customers that many of them don’t have a clear idea of what type of nails they need. Many more aren’t even aware that there are so many different types!
We’ve put together a list of 10 of the most popular nails used today. This certainly isn’t an exhaustive list, but it should go a long way to helping you understand the kinds of nails that are out there and what you can use them for.
1. Common Nails
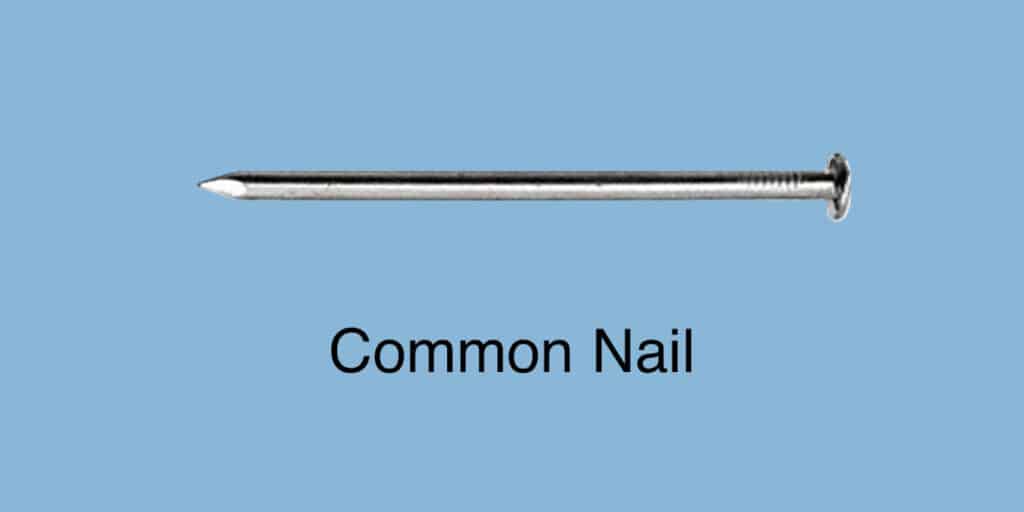
This is your run-of-the-mill nail. You’ll find it everywhere and it’s widely used for joining timber. It has an almost flat head (the top) that’s slightly larger than the shank (the pointy part). It’s great for most general jobs but doesn’t have any extra features.
2. Box Nails
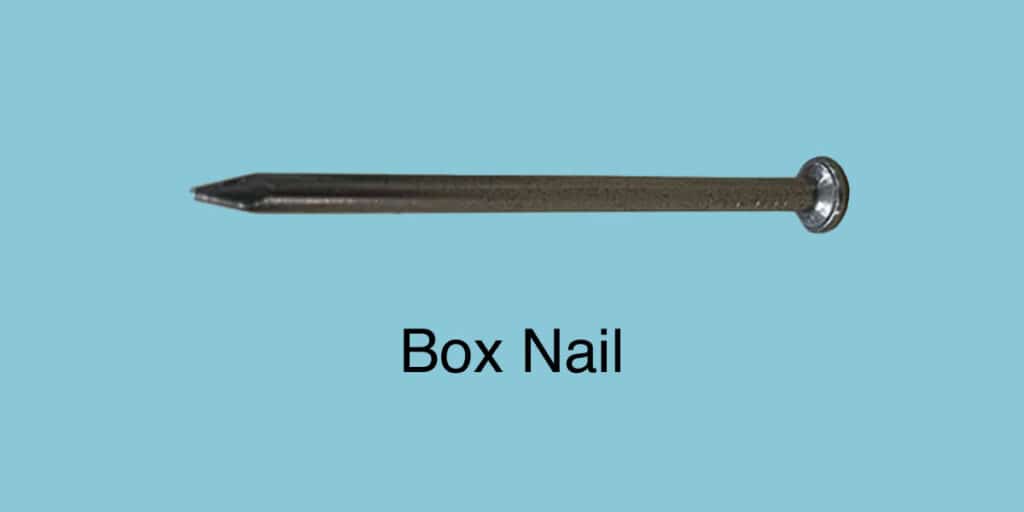
These are similar to the common nail, but they have a noticeably thinner shank. This thinner diameter means you’re much less likely to split the wood, but it also means these nails aren’t as strong as common nails.
Use these on smaller, more delicate projects where you’re worried about splitting. Don’t use these on anything heavy-duty or weight-bearing.
3. Masonry Nails

Basically the opposite of a box nail – these things are heavy duty. Designed to be driven into brick or stone, these nails have small heads and thick, hardened shanks that won’t break.
Masonry nails can appear in a variety of shapes but generally feature a tapered shank. As expected, they’re great for masonry. But don’t use this on wood or the tapered shank is likely to split the timber.
4. Concrete Nails
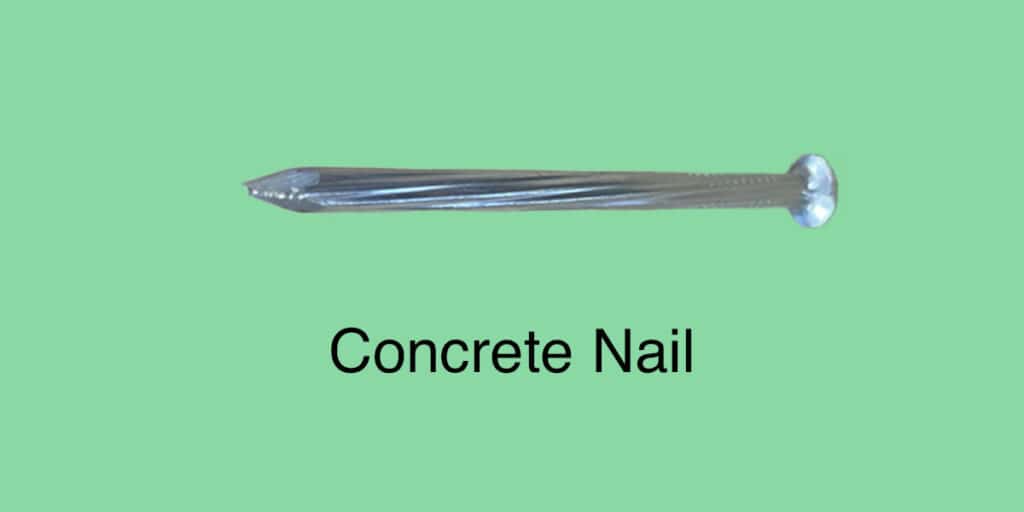
The ‘Concrete Nail’ is another type of masonry nail that’s usually slightly more expensive. These are similar in shape but have fluted shanks (meaning they have little grooves in them) that offer even more holding power. It makes these nails ideal for driving into concrete, which is generally a much tougher surface than masonry.
5. Cut Flooring Nails
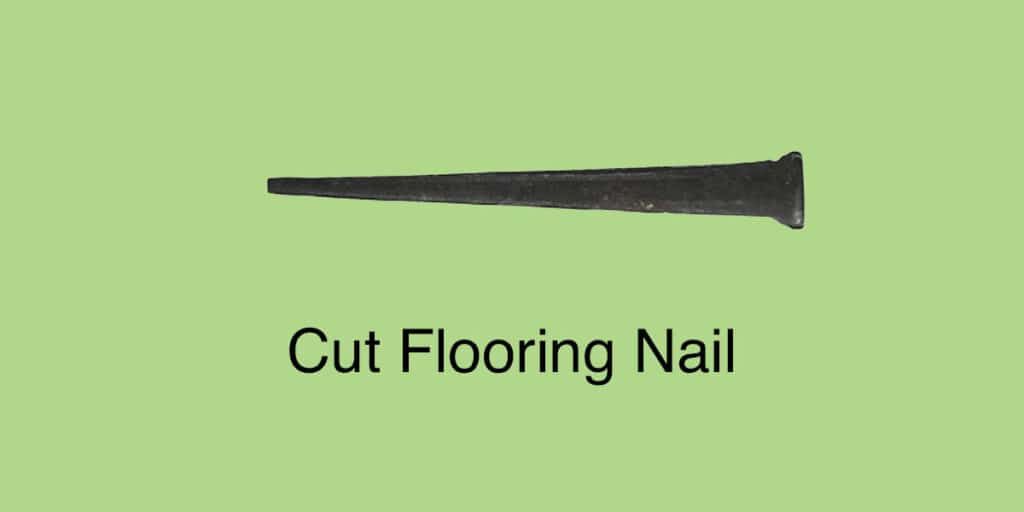
Probably the most unique looking nail on this list, cut flooring nails are cut from a sheet of steel or iron and have a tapered square shank, rather than a rounded one like the other nails. This square ‘cut’ shape was actually the most common style of nail until the mid 20th century.
These days, cut nails are primarily used for securing hardwood flooring. When driven in parallel to the grain of the wood, they can provide an extra-strong hold compared to round nails. Their flat rounded heads also give off a great ‘antique’ look that complements wooden flooring.
6. Finishing nails

These nails are similar in shape to a common nail, but they have smaller barrel-shaped heads. These small heads can be driven below the surface of the wood using a nail set (called countersinking) to make the nail’s presence much more subtle.
This makes these nails great for finishing jobs, hence the name. Finishing nails are used most commonly in upholstering furniture or when installing an interior trim.
7. Brads
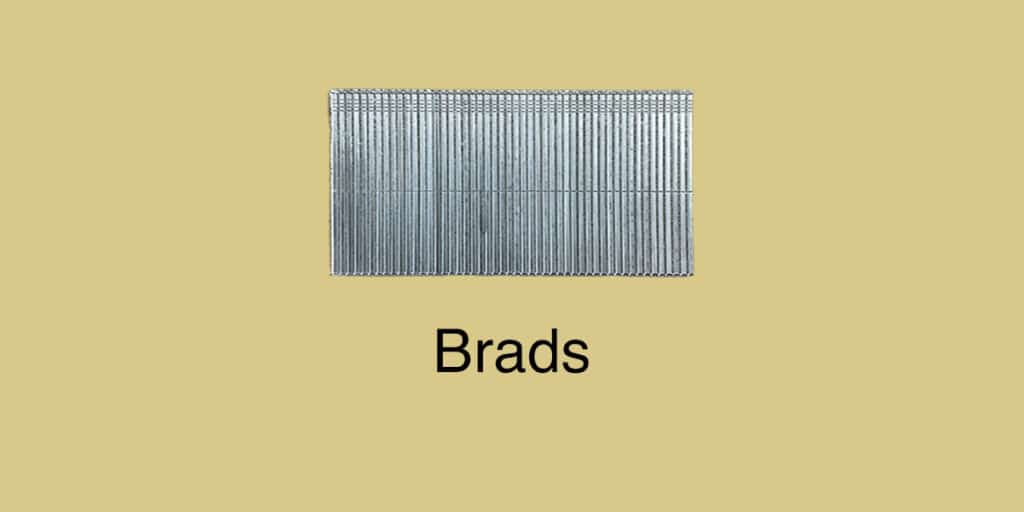
A close relative of the finishing nail, but smaller. These nails are made from fine, 18 gauge wire and are generally much smaller and thinner than most other nails. Like finishing nails, they have a small barrel-shaped head that can be countersunk below the surface of the wood.
However, the thinner shank means that these nails aren’t as strong as finishing nails. Use Brads for small or fiddly crafting work when you’re worried that a bigger nail will split the timber.
8. Double-headed Nails
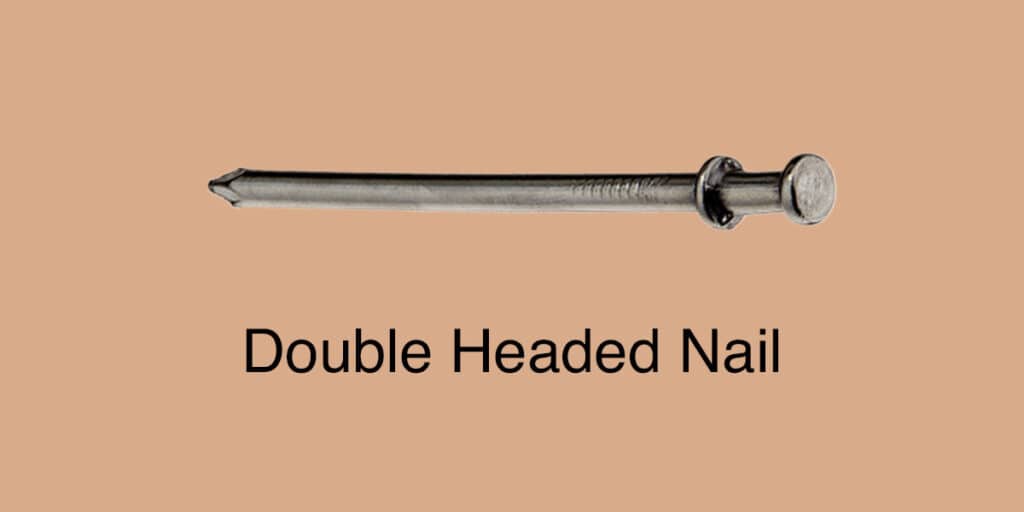
Sometimes called ‘Duplex’ nails, these are great for temporary constructions like scaffolding. These nails have two heads, but are typically only driven up to the lower head, leaving the top head sticking out. This makes them extra easy to remove later.
9. Roofing Nails
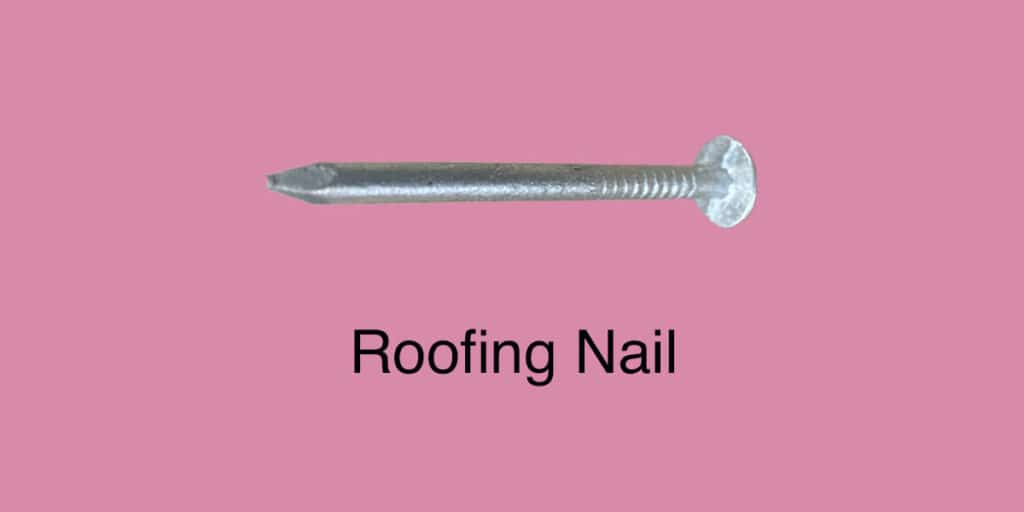
Roofing nails have very wide heads and heavy, galvanised shanks. These nails are highly resistant to weather and are designed to hold down roofing material in all kinds of weather conditions.
10. Annular Ring Nails
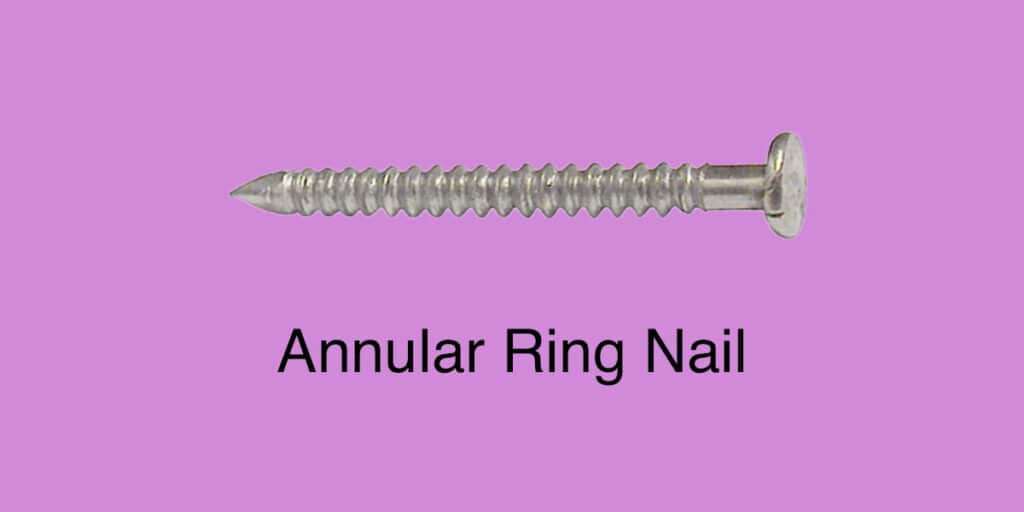
These thin nails have rings lining the shank to help hold the nail in place. At first glance, this nail may resemble a screw, but all of these annular rings are self-contained and don’t go around in a spiral.
Instead, these rings will push the wood particles aside as the nail is driven in. The particles then settle back into place between the rings, giving the nail extra-strong holding power. For this reason, annular ring nails are used when you need your project to last a long time. They’re most often found holding up boards on the outside of homes.
This is by no means an exhaustive list. There are many variants on these nails out there, with some of them being quite obscure. But knowing more about these 10 common nails will still give you a much better understanding when you’re choosing nails for your next project.
Not keen to waste time at the hardware store? Order from our huge range of nails and tool accessories at Multifors. Delivery anywhere across metro Melbourne from only 19.95!
